Writing a Bootloader Part 3
In our previous article we got our CPU into 32-bit protected mode and printed the screen using the directly mapped VGA memory. This time we’re going to compile and load a C++ function into memory and call it!
Going beyond 512 bytes
The BIOS only loads the first 512 bytes of the bootsector. If we want to write programs larger than 512 bytes (maybe you don’t want to and like a challenge?) we’re going to have to load more off the disk. To do this we’re going to use the int 0x13 interrupts which provide disk services.
The ah=0x2 int 0x13 command reads sectors from a drive to a target location, like this:
mov ah, 0x2    ;read sectors
mov al, 1      ;sectors to read
mov ch, 0      ;cylinder idx
mov dh, 0      ;head idx
mov cl, 2      ;sector idx
mov dl, [disk] ;disk idx
mov bx, copy_target;target pointer
int 0x13
The disk number is implicitly placed into dl by the BIOS on startup. Earlier on we stashed it into memory with mov [disk], dl.
So we can now load 512 bytes from the second sector into memory! Let’s make use of that and move the hello world printing code from last time beyond the first 512 bytes of disk. Like this:
times 510 - ($-$$) db 0
dw 0xaa55
copy_target:
bits 32
    hello: db "Hello more than 512 bytes world!!",0
boot2:
    mov esi,hello
    mov ebx,0xb8000
.loop:
    lodsb
    or al,al
    jz halt
    or eax,0x0F00
    mov word [ebx], ax
    add ebx,2
    jmp .loop
halt:
    cli
    hlt
times 1024 - ($-$$) db 0
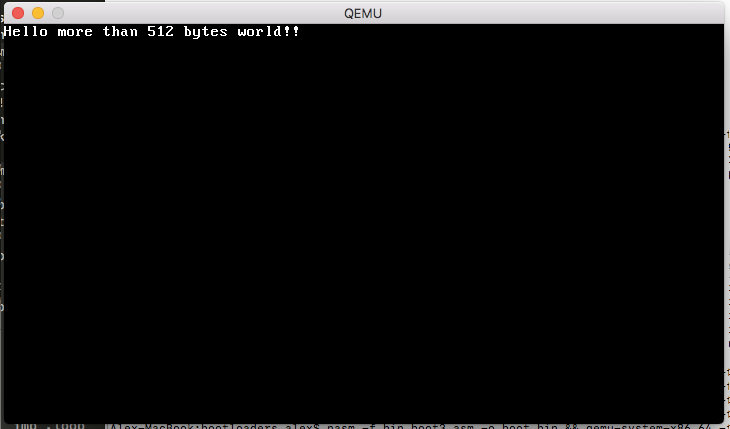
The last line pads our bootloader to 1024 bytes so we’re not copying uninitialised bytes from disk. It’s probably easiest to download boot3.asm directly. You can compile and run it with nasm -f bin boot3.asm -o boot.bin && qemu-system-x86_64 -fda boot.bin getting this result:
Getting to C++
Next we’re going to load a C++ function that prints Hello world into memory and then call it from the bootloader. Here is the C++ function we want to compile:
extern "C" void kmain()
{
    const short color = 0x0F00;
    const char* hello = "Hello cpp world!";
    short* vga = (short*)0xb8000;
    for (int i = 0; i<16;++i)
        vga[i+80] = color | hello[i];
}
I’ve intentionally kept the function as simple as possible - it does almost the same thing as the assembly code. The extern "C" prevents C++ from name mangling the function allowing us to call it from assembly.
Compiling and Linking
We now need to compile and link this function. To do this safely we need to create a cross compiler - this is safer than using your system’s C++ compiler since we can be certain about what instruction set and function call method the compiler uses. I also can’t for the life of me convince clang to use a linker script and stop adding loads of OSX specific stuff. Since we’re building a 32 bit operating system we also want the compiler to output 32 bit instructions - not 64 bit ones!
Compiling a cross compiler is an absolute pain - but luckily I’ve hacked a homebrew tap you can use:
brew tap zanders3/homebrew-gcc_cross_compilers
brew install --debug i386-elf-gcc
Interestingly upgrading Mac OSX can mess gcc and all sorts of things up so try these commands if things fall over.
xcode-select --install
brew reinstall gcc
This will install i386-elf-_g++ on your path which will compile and link stuff for us! Installing takes a while - you might want to grab a cuppa whilst it compiles.
Linker Script
We need to tell gcc how to link our cpp file and asm files together. We want the boot4.asm code positioned at offset 0x7c00 so that the 510th bytes equal 0xAA55 which makes it a valid bootsector. We then want all of the C++ code placed after that in the file.
ENTRY(boot)
OUTPUT_FORMAT("binary")
SECTIONS {
    . = 0x7c00;
    .text :
    {
        *(.boot)
        *(.text)
    }
    .rodata :
    {
        *(.rodata)
    }
    .data :
    {
        *(.data)
    }
    .bss :
    {
        *(.bss)
    }
}
The ENTRY(boot) means the entry point of the program is the boot symbol. OUTPUT_FORMAT("binary") tells gcc to output raw assembly directly. It will otherwise output a binary file in ELF. The . = 0x7c00 tells it to start outputting code at that offset, similar to the org 0x7c00 command.
Calling C++ from Assembly
Next we need to modify our assembly so it can be linked with gcc. First we’re going to put everything in the .boot section so it’s placed first as well as define a global boot: symbol so the linker knows about the entry point.
section .boot
bits 16
global boot
boot:
Next we’ll hack the disk reading function call to load more than one sector:
mov al, 6 ;sectors to read
Finally we set up a call stack for C++ to use and call the actual function. We reserve 16 KB for a kernel call stack.
mov esp,kernel_stack_top
extern kmain
call kmain
cli
hlt
section .bss
align 4
kernel_stack_bottom: equ $
    resb 16384 ; 16 KB
kernel_stack_top:
That’s it. We’re ready to compile and run this thing! Here are my versions of the linker script, cpp file and bootsector assembly!
Compiling and Running
You want to compile the assembly, then link it all together.
nasm -f elf32 boot4.asm -o boot4.o
i386-elf-_g++ x86_64-elf-g++ -m64 kmain.cpp boot4.o -o kernel.bin -nostdlib -ffreestanding -std=c++11 -mno-red-zone -fno-exceptions -nostdlib -fno-rtti -Wall -Wextra -Werror -T linker.ld
We can run hexdump kernel.bin to check it did the right thing:
0000000 b8 01 24 cd 15 b8 03 00 cd 10 88 16 61 7c b4 02
0000010 b0 06 b5 00 b6 00 b1 02 8a 16 61 7c bb 00 7e cd
0000020 13 fa 0f 01 16 5b 7c 0f 20 c0 66 83 c8 01 0f 22
0000030 c0 b8 10 00 8e d8 8e c0 8e e0 8e e8 8e d0 ea 22
0000040 7e 08 00 00 00 00 00 00 00 00 00 ff ff 00 00 00
0000050 9a cf 00 ff ff 00 00 00 92 cf 00 18 00 43 7c 00
0000060 00 00 00 00 00 00 00 00 00 00 00 00 00 00 00 00
*
00001f0 00 00 00 00 00 00 00 00 00 00 00 00 00 00 55 aa
0000200 48 65 6c 6c 6f 20 6d 6f 72 65 20 74 68 61 6e 20
0000210 35 31 32 20 62 79 74 65 73 20 77 6f 72 6c 64 21
0000220 21 00 be 00 7e 00 00 bb 00 80 0b 00 ac 08 c0 74
0000230 0d 0d 00 0f 00 00 66 89 03 83 c3 02 eb ee bc f8
0000240 be 00 00 e8 02 00 00 00 fa f4 55 48 89 e5 48 83
0000250 ec 20 c7 45 f8 00 0f 00 00 48 c7 45 f0 ad 7e 00
0000260 00 48 c7 45 e8 00 80 0b 00 c7 45 fc 00 00 00 00
0000270 83 7d fc 0f 7f 34 8b 45 fc 48 63 d0 48 8b 45 f0
0000280 48 01 d0 0f b6 00 66 98 80 cc 0f 89 c2 8b 45 fc
0000290 48 98 48 83 c0 50 48 8d 0c 00 48 8b 45 e8 48 01
00002a0 c8 66 89 10 83 45 fc 01 eb c6 90 c9 c3 48 65 6c
00002b0 6c 6f 20 63 70 70 20 77 6f 72 6c 64 21 00 00 00
00002c0 14 00 00 00 00 00 00 00 01 7a 52 00 01 78 10 01
00002d0 1b 0c 07 08 90 01 00 00 1c 00 00 00 1c 00 00 00
00002e0 6a ff ff ff 63 00 00 00 00 41 0e 10 86 02 43 0d
00002f0 06 02 5e c6 0c 07 08 00
00002f8
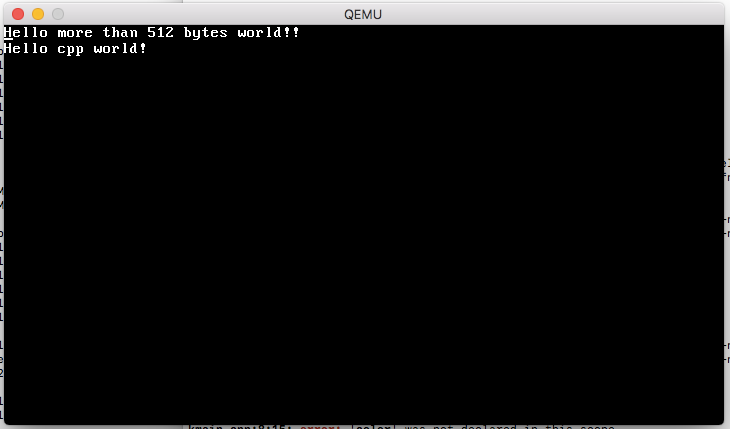
Note the 55 aa there near offset 0x200? That means it’s a valid bootsector! Let’s try running it with qemu-system-x86_64 -fda kernel.bin and you should get this result.
Wrapping Up
That concludes this tutorial series! I hope this was useful to you.
There many more interesting low level things to explore such as setting up virtual memory, handling interrupts and writing your very own memory allocator! I hope to start exploring these in the future.